BLOG

Stretch vs. Strength


How do you know whether to stretch or strengthen? Often when we feel a muscle tighten, we immediately think that we need to stretch. Do we really know what the tightness in the muscle means? Is it tight from overuse, or is it atrophied? Atrophy is defined as “wasting away in a living body with lessening of size and strength… emaciation.” There are several situations that can lead a muscle or group of muscles to atrophy. It is useful to know how a muscle may be atrophied and how we can learn to tell the difference between atrophy and overuse.

Accidents and injuries are the most common precursors to atrophy. An accident could be a fall, crash, slip or trip that then leads to an injury.  The injury can range from a bruise or inflammation, to a tear or even breakage. Atrophy can occur after the mildest or most severe situation.  Regardless of the cause of the atrophy, what can start to occur is an interruption in the brain’s ability to send the muscles a message to fire, or engage and to act in a natural way.

Due to the injury and depending on the severity, we often need rest, ice, elevation, or possibly even surgery. During this period of rest and recuperation, the brain continues to not send the message to fire or engage to those muscles in order to protect them. Over time, our body develops a habit of not using these muscles and relies on the rest of the self; this is referred to as “compensating.” This built-in reaction is our self-preservation and thank goodness we have it.  It keeps us alive.  However, once the injury is in recovery the habit remains. The compensations have taken over and without awareness this will never change.

There are two specific ways to know when a muscle has atrophied. One, is noticing the size of the muscle.  Has it decreased in size?  Secondly, are you able to contract or fire the muscle? An atrophied muscle is nearly impossible to fire, or it has a delayed response in firing.  Theoretically, a healthy muscle can immediately fire and will contract. You can test and compare one side to the other on yourself. In your mind you should be able to tell yourself to “contract” and the muscle will fire/engage. Can you do this on the site of injury?  Most likely it will be severely delayed. If you have had surgery, it may be so atrophied that it barely fires at all.

Extreme atrophy can occur when a long time, perhaps even years, have passed since the onset of an injury. This feels like your muscle has become so tight that despite your efforts to stretch, it will never release.  In fact, it may even feel as if the muscle may even snap, as if there is no juice left in it. This is atrophy, not tightness from overuse. It is critical for you to go through these two tests to determine if your muscle is tight due to atrophy or to overuse.

Overuse of a muscle can also occur from an injury. Overused muscles are the muscles compensating for the atrophied muscles.  Similar to an atrophied muscle, the overused muscle won’t likely release due to the brain telling the muscle to “protect” and “preserve” itself.  The only way to get an overused muscle group to let go from compensating is for the injured muscle to begin to work again to activate and perform.  Then the overworked muscles will let go. It’s hard for us to understand, but there is a whole dialogue going on inside your brain with your body.  Over the past 25 years of working with thousands of individuals I will tell you that most likely, especially if you have had an injury, both situations are going on.  I hope to create a way for you to know and understand what your body is doing so that you can strengthen, stretch, or do both to address the situation.

I have found that after bringing strength back to the atrophied area, healing and recovery begins immediately, returning the body to a higher functioning level. Stretching alone will take you nowhere. Strengthening and stretching are equally important. Add in the strength first and get those atrophied muscles to start firing and regaining some strength. Then apply stretching during your cool down. You will be amazed at how quickly you will start to recover feeling balanced again.

How to evaluate yourself:

– Did you have an injury?  If so what part of yourself did you injure?

– Can you fire the muscles that are injured? Compare the injured side to your healthier side. Is there a delay? Less strength? No strength?

– Do you have visual and noticeable reduction in the size of the muscle?

– Do you have tightness in the muscle that never changes despite your efforts to stretch?

Now that you have identified the atrophied muscle(s), it is time to strengthen them. You may want to seek out advice from a trained professional like a Physical Therapist to help you determine the muscle groups you need to begin strengthening. They can help you develop a program or a routine. Next, get started with that routine and be diligent.  It is going to be hard work because these muscles have been lax for quite some time. However, the more consistent you are, the faster your recovery will be. Notice if the compensating (tight) muscles begin to loosen on their own. Most of all remember it is critical for you to learn how to feel, sense, and become aware of yourself to make a change and to restore freedom of movement back into your life!

Is Variety Part of Your Game?

How often have you been told to spice up your workout?  And do you?  Often we fall into a routine or a rut that keeps us repeating the same motions, using the same muscle groups, and hence overworking certain muscle groups leading to a decline in our performance and possible injury.

Variety (some call it cross training) in many ways in your life, can be the “spice” of your life!  How to we go about finding the variety?  How will we know if it’s working or if we even like the variety?  Like almost anything and everything in life, you just have to do it.

Let’s start off by breaking up your routine into a few simple categories: Endurance, Strength, and Flexibility. These three key ingredients make up any sport.  The more  we have these three key ingredients in balance, the fitter, stronger, and more flexible we become.  Our performance has an opportunity to improve dramatically.

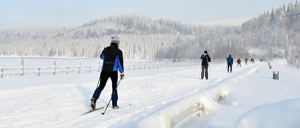
Endurance is often linked to sports like cycling, swimming, and running.  What other sports could we substitute for these three? I know for myself, I exchange running for skate- skiing.  I know it maybe hard to believe but I just stop and don’t run at all for at least three months.  Why?  To give those muscles a rest.  By switching to skate skiing, I end up using similar muscles but in a very different way.  This helps the muscle actually become stronger in places it may be weaker due to the repetition.     I have to say that since three years ago when I started this shift, I have run my two fastest summers in all my life. Not bad for starters. 

For Cycling, obviously there is spinning, but what about down hill skiing, snowshoeing or even hiking? What about Ice-skating? Hockey? They use similar muscle groups but in different ways which helps aid in recovery while firing different parts of the muscles.

Swimming is definitely hard to replace or exchange especially since the breathing is so critical under water. However, you can mix it up beyond just swimming laps.  So playing some sports like basketball, or volleyball or a game of catch.  Add in some drills in like holding your breath under water for the length of the pool.

Become creative with different ways to implement change.  You can combine Strength with Endurance and try  Cross Fit Training; The Stair Master, Jacobs Ladder, Pre-Cor EFX, kick boxing, karate, jumping roping, rowing using the TRX, Weight Lifting, Zumba classes, and I am sure there are many more. So if you have always gone to the gym and lifted weights, try a TRX class, Egosque, Pilates or Zumba.  You might be pleasantly surprised.

In addition, Isolated Strength Training is really important for helping any muscle groups that are weak.  Often after an injury or surgery, multiple muscle groups can become atrophied, lax, and or weak.  It is critical, as soon as possible into your recovery, to begin to isolate and strengthen these muscle groups with strength training to getting them to start firing again.  If you are not sure if you have any weak muscles, first ask yourself the question: Do I have extreme tightness say in my IT band?  In my hamstring?  In my shoulder? In my Lower back?  If so, most likely another muscle/muscle group is very weak.  The next step I recommend is to see a physical therapist.  Go over what activities you do, where your tightness is, when it occurs, and ask what could possibly be weak that is creating the tightness in other muscle groups.  Then begin a program they will create for you of 5-10 daily strengthening exercises for you to do.  It is essential to add these in to your daily routine for a minimum of 3 months.

Flexibility.  There are several ways to become flexible.  In addition to basic stretching, there is what I call Active Stretching where you continue to move while stretching, The “Feldenkrais Method “(which is what I teach), all forms of Yoga, Pilates and, even Melt.  Again, I can’t stress enough the importance in having a variety of stretching in your repertoire. The more you mix it up, the more you will reap the benefits. A minimum of 2-3 days a week with any of the forms mentioned is recommended.  It is critical to stretch gently after any form of endurance training/workout.  Allow yourself at least 10 minutes to cool down and stretch.  I recommend to either follow what an instructor has designed for their class, or to try my active stretching, or to create your own. Just do it!  Enjoy discovering some  FUN, EXCITING, and  NEW ways to workout, train hard, and add variety “The Spice of Life” back into your life!

Rhythms

Here is the second article in a series I am writing for TriathaNewbie.com for beginner triathletes.  To read the first article, Breathing, click here.

Rhythms

Hopefully you have had the opportunity to work with the first rhythm, your breath and the tips I offered in my first article on breathing.   There are many rhythms going on simultaneously, and in this article I will speak about each sport and its rhythms, starting with swimming.

Rhythms in Swimming

Your breath is completely different in the water than out of the water and finding your breathing rhythm is critical.   Beginners often hold their breath while under water.  Begin by noticing if you blow small bubbles out during your exhale, and while your face is in the water.  If not, begin to learn to do so.  Otherwise you are holding your breath and waiting until you turn your face to take in another breath. It will feel difficult to take in a breath if you haven’t exhaled under water and made room for the next inhale. Once you develop blowing bubbles and exhaling under water, you can start to focus on the rhythm of you arms and stroking.  As you swim, draw awareness to your stroke and notice the rhythm just like the beat of a song.  In your stroke there is a rhythm, and the turning of your head to take a breath must become part of your arm stroke rhythm.  This  awareness creates improvement and adds clarity. Finding the rhythm between these two movements is essential for an effortless swim.

In addition, notice the rhythm of kicking of your legs and feet, as well as the slight turn in your pelvis.  Shifting your attention to each of these areas and feeling the rhythm will help you to develop your own natural pace leading to a more effortless swim.

Rhythms in Running

Breathing while running is much more natural than trying to pace your breath while in water.  Once you begin to run, I recommend drawing your attention and awareness to your breathing as soon as possible.

You want to find your rhythm right from the beginning. If not, you will be off to a bad start that may perpetuate for the entire run.  The key is in your exhale, as discussed in my previous article, to find a rhythm and flow between your inhale and exhale.  This does not mean slow; it means find a flow like the beat of a song.  A beat can be fast or it can be slow, but it must be consistent.  Once you’ve established your breathing rhythm, you can shift your attention to your feet, feeling the rhythm of each foot stepping onto the pavement or trail.  Just like the beat of a song.  I know many of you may indeed listen to music while running, I do too, and this is fine. It provides a beat, and a rhythm to connect to.  This can help you increase your stride when there is a faster beat, or slow it down giving yourself a bit of a break.  Make sure to always have your breathing rhythm regulated and consistent so you don’t run out of gas.

While running, there is also the rhythm with your arms.  I like focusing on my elbows and how they brush along my sides pulling backwards.  As the motion gets larger or faster, your gait will follow and become larger and faster.  In many ways, the pulling back of your elbows regulates your entire gait.  This is a great way to play with increasing your speed and then adapting your breath to the faster pace to learn to run faster with efficiency.

Rhythms in Cycling

Once you are on your bike, take a moment to tune into your breath and become aware of your inhale, your exhale, and your rhythm. The next greatest rhythm in cycling is in the turnover of your legs.  I like the image of a clock, which is used in many spinning classes.  Visualize twelve o’clock being the top of the circle, and six o’clock at the bottom. Three o’clock is half way down in front and nine o’clock is pulling half way up the backside.  As you’re pedaling, you can draw attention to one of these four spots on the clock. Nine o’clock is a great place to develop your skill in pulling up to twelve o’clock.  Bring your attention and focus to pulling up at nine to twelve o’clock. I prefer to focus on one leg at a time, then after a minute I will shift to the other leg.  Find the rhythm and smoothness in this area of pulling up.

It is very useful if you have any kind of console or tracking device to view your RPMs and or watts.  When you have found a rhythm, you will find your RPMs will stay very consistent and hopefully the watts will stay very consistent and high as well.  It is important to regulate the rhythm in your pedaling as well as in your breathing.  Shift your attention to each of the four quadrants of the clock because this helps to develop both your push and pull, and obviously awareness.  As you shift from one quadrant to the next, make sure to check in with your breathing and make sure there is still a rhythm and ease to your breath.  From here, you can play with adding in a surge with a sprint or a hill climb.  Obviously your pedal rhythm and RPMS will jump up, but can you maintain higher RPMs with the quality of smoothness and effortlessness still in your breathing?

Smoothness is one of the keys to feeling your rhythm whether your pedaling on your bike, running on a trail or treadmill, or stroking the water with your arms while swimming.  Give these tips a try the next time your out for a spin, a run or a swim and most of all, have fun!

Finding Your Step

Recently, there has been focused research about gait analysis and how people step as they run.  You can go to almost any running store or see a running coach and have them observe you running outside, or on a treadmill to determine if your running, or foot strike is inward, outward, unstable (are you pronating, supinating, or lacking motion control?).  Most running stores are incredibly helpful now in assisting you in finding the best shoe based on their analysis of your foot strike.

This is an excellent way to start your year off, and finding your best shoe.  First and foremost, listen to what your coach or running store worker is observing.  Find the right fit based on their information, and trying on a variety of options.  While trying on the different shoe styles and brands, look for a few key points:

1) The fit.  The shoe/or five fingers, should fit perfectly and feel comfortable. Comfort is essential.

2) The Tripod. The Tripod is a Feldenkrais idea based on the three most critical points of contact to pay attention to on the sole of your foot.  The tripod includes the ball of the big toe, ball of the pinky toe, and the center of the heel. When standing in the shoe/five fingers, you should feel a fairly even distribution between these three points of contact. Later we will discuss how the tripod will assist you in finding your step.

3) Experience. Spend a significant about of time walking first then briefly running in the shoe/five fingers to see how they feel.  Draw your awareness to the sole of your feet searching for the tripod. Can you notice do you roll out? Roll in?  Do you feel unstable? Look for stability, fairly even distribution between the three points of the tripod, and comfort while walking and or running.

4) Compare. Always take in your past shoes and put one on one foot and the new option on the other. This helps to notice and become aware of what you were wearing, how the new option compares, and does it provide that sense of comfort, stability and even distribution among the tripod points. If not, try on another option, style or model/make.  Take your time to find the right shoe.

There is more to the process than finding the right fit or the right shoe or even running barefoot. As Christopher McDougall wrote so simply in his article in the New York Times Magazine this fall, “We don’t need smarter shoes; we need smarter feet.”

So how do we get smarter feet?  By finding your STEP.  I have been running for 31 years and have been teaching the Feldenkrais Method for 26 years.  In that  time, I’ve have had a lot of opportunities while running, training and competing to think, feel and develop a simpler way to help you discover your STEP.

First off, find your tripod for each foot.  Then develop a visual image of the tripod. Next, transfer the thought to the sole of your right foot. Feel the image under the sole of your foot and connect to the earth. Imagine the ball of the big toe, ball of the pinky toe, and the heel all pressing evening into the floor/earth. Congratulations, you have now established a visual image, and transferred it into a physical awareness/sensation. Repeat now with your left foot.  While standing become aware of both of your tripods.  Now you are ready to learn to STEP. It is really a simple concept.  Just thinking, and finding the STEP, creates the opportunity for all those natural motions to fall into place.  If you have too much to focus on, it becomes confusing for both your mind and body.

Tripod Foot

While standing, notice both tripods. From there you can shift your weight a little more onto one leg and get ready with the other leg to take a STEP.  It doesn’t matter which leg, just notice which leg feels more automatic to initiate a STEP. Take a STEP and land on the whole foot, finding the tripod again. From here notice what must take place deep inside your hip joint to allow you to have your weight evenly distributed over the three points of the tripod.  You must bring your hip directly over your ankle and the sole of your foot.  I call it ‘growing tall’ in the hip joint, or finding the ‘high point’ in your hip joint. How do you know if your doing it right?  Slip off the high point of the hip joint. Try taking a step and keeping your hip and upper body back behind you; most likely you will only have your heel down. What would it take to bring yourself on top of your ankle/foot?  Feel the effort to get there. Now try taking a step and shooting your hip laterally out to the side, do you now roll to the outside of your foot and loose your balance? What effort would you need to do to bring yourself back into balance over your ankle/foot?  Take a step and bring your hip in direct alignment with your ankle/foot.  Do you feel the tripod now? Does your knee actually disappear?  How balanced and or stable are you now as you grow tall over your hip joint?  Can you feel how your chest becomes lifted? Now Step back and repeat the same movement at least 6-8 times with this foot.  Notice each time it becomes easier to find your STEP, and getting tall in the hip joint, as well as your entire self. Notice your balance.  From here, feel how free it is to bring the other leg through to find your STEP with this leg. Repeat on this side 6-8 times. Once you have felt finding your STEP, you are now ready to take your image, thought and sensation outside for a run or to the treadmill.  Remember, this is just one moment in your gait that is critical for proper alignment, propelling yourself forward, finding balance, stability and effortless running.  The key is finding the moment when you’re on the entire foot; finding your STEP.

Breathing

I recently wrote an article about breathing for TriathaNewbie.com, a great resource for triathletes that are just beginning their journey.

Deciding to take on your first triathlon is a wonderful decision.  Many of you may be wondering where to start, what you will need to learn, and what the key ingredients are to a successful first race. In order to address these questions, my upcoming articles will focus on breathing, rhythm, and transitions.

Breathing
There has been so much said, discussed, and suggested about breathing, including when to inhale and when to exhale.  With so many theories, it can become confusing.  While you are in the process of trying to place your breath where it should be, you could be tensing up your chest, holding your breath, or clenching your jaw.

The goal here is to make it simple, because breathing is quite simple.  First and foremost, we all need to remember that breathing is one of the few things “built in” or “wired into” our brain and nervous system.  Breath is automatic.  Often we experience different inhibitions that affect our breath.  How do these inhibitions show up?

Here are a few ways we can notice and discover our inhibitions: Are you pushing too hard? Trying too hard to go faster? Lifting too much weight in the gym? Straining in a yoga class? Overreacting to a situation? Tensing up due to an uncomfortable situation?  These are just a few examples that many of us end up experiencing in our daily lives.  If you notice, in most of those situations there is a push or a strain to do more.  When this occurs, holding one’s breath is the first thing to happen and this is the moment when things start to fall apart.

Holding one’s breath is the beginning of the end.
It is necessary to learn to regulate our breath and in order to do this, we should focus on the exhale.  Notice the moment when something begins to feel difficult; the breath will shift and become faster and quicker, which is normal and to be expected. However, during that change it is just as important to notice our exhale.  If we loose our exhale, or if it is extremely short, that is the moment when we need to back off to prevent from going into a pattern of holding our breath.  By backing off just a small amount, we give ourselves the opportunity to self-regulate our breathing again.  This means the breath returns to being continuous, the exhale is present, and there is a flow to the breath.  As soon as this is established, you can begin to introduce intensity, to increase your speed, to climb harder on the bike, or to break into a faster pace.

As I was teaching a class recently one of the thoughts I brought to the room was: “How much do we use pushing hard, being tough, straining, and being out of breath as a way to measure how we are doing?  If we are not ‘pushing hard’ are we are doing enough?”

My intention is that this series of articles will help guide people into a new approach of measuring progress with breath regulation, less effort while gaining ease and fluidity. Why does it need to be hard?

Look at this as your first opportunity to learn to self-regulate your breath. The key is to back off when things get hard.  When I say back off, it’s just by a fraction, just enough so that you can get your breath back to its rhythm, and continuous flow.  There are four parts to your breath you want to become aware of; the inhalation, a pause, the exhalation, and a pause.  The pauses are needed to transition the phases of inhaling or exhaling. All four parts of the breath are needed.

As you learn to bring awareness and attention to your breath, look for the four parts, their flow and their rhythm.  If you find yourself HOLDING your breath, back off and self -regulate, this means reestablishing the four parts of the breath.  This will become a great tool in your first triathlon and when learning to conquer more challenging events in the future.

Remember, your breath is a key ingredient to a successful and fun first triathlon experience.  Begin now introducing yourself to the four parts of your breathing.  Start by noticing them in a non-active state.  Next, bring your awareness to the pool, running, and to the bike.  You will immediately find out that your breath is completely different in each activity and situation.  Once you become familiar with your breath, always keep an awareness of your breath in the background of yourself.  Then, when needed, you are able to bring your breath to the foreground of your attention at anytime. Look for the moment when you get shortness of breathing, or holding your breath, or too rapid of a breath, back off and find the ease again. This will truly allow you to learn to self-regulate.

Self-regulation will be one of your greatest tools and gifts forever!

In the following articles I will build your ability to self-regulate, adding in rhythms and transitions. It is critical entering a triathlon to understand these aspects preventing overuse, exhaustion, hitting the wall, and a miserable experience.