BLOG

Posture in the Workplace

Sitting down is part of nearly everyone’s workplace today, whether at a desk or in a car. Unfortunately for many of us, sitting incorrectly is causing stress and pain in our bodies. By improving the way you sit, whether at a desk or in a car, your workday can be improved and your body will thank you. Sitting correctly involves not only your ability to align your body, but is also dependent on the workspace you create for yourself. Adjusting your seat or rearranging your desk may be the key to your comfort in the workplace and car. Your sitting posture may be the key to being pain-free and to start enjoying more activities in your life.

Sharon Starika movement educator Posture in the Workplace

SITTING WITH PELVIC SUPPORT

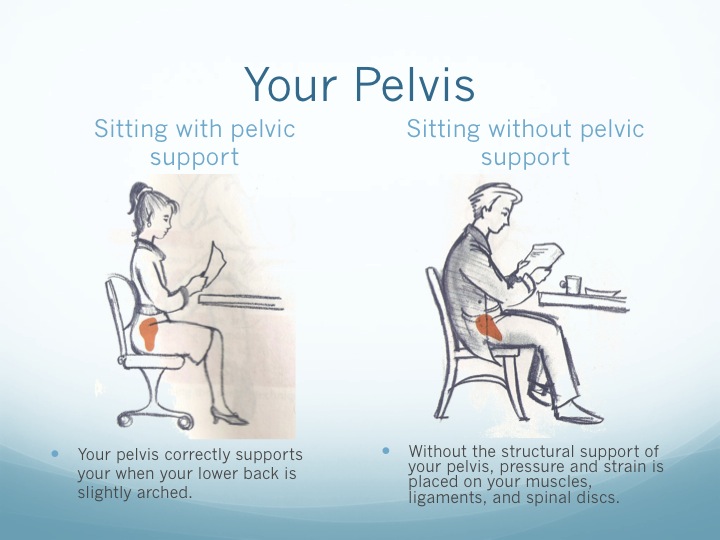
In the diagram below there are two images. The image on the left shows sitting with pelvic support and the image on the right shows sitting without pelvic support. Your pelvis is the base of your skeleton and the main source of structural support and the key to successful sitting. In the image on the left, see how the pelvis aligns with the spine. Highlighted in orange, close to the chair, is the area we call your “sit bones” and that is the area you should be sitting on. Looking at the right image, you can see the pelvis is curled under and there is no support.

Your pelvis is able to support your body’s weight easily and efficiently, but if your back is rounded when you sit, your body’s weight is placed behind your center, collapsing your spine. Once sitting correctly on your sit bones, your weight is distributed evenly and your back can relax and is flexible to tilt, bend and turn with ease.

Sharon Starika movement educator Posture in the Workplace

SITTING AT YOUR DESK

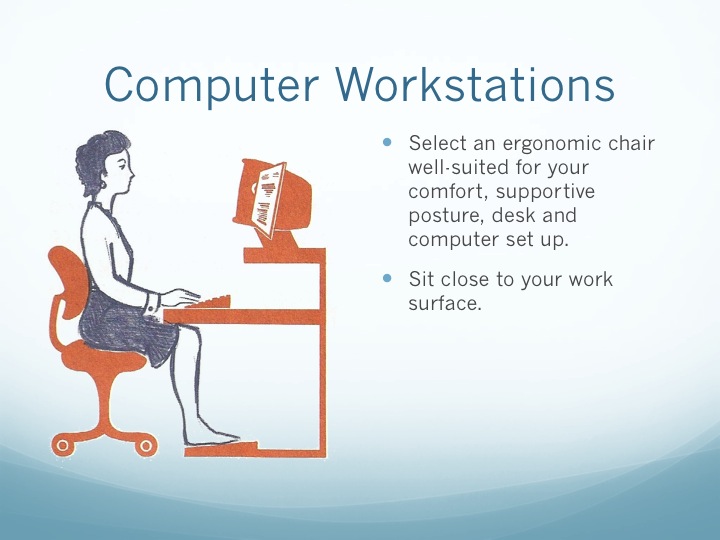
In the video below, you will see different ways you might be sitting in your office. You will notice that there is a large space between my pelvis and buttocks from the back of the chair. My pelvis is curled and does not support my spine. Then you will see how I scoot my pelvis into the back of the chair and pull myself closer to the desk. Now I have complete support from the backrest and I can reach from my trunk and pelvis because I am sitting on my sit bones and am no longer rounded. I am easily able to turn and reach, which is important in a work environment.

CHAIRS AND SEATS

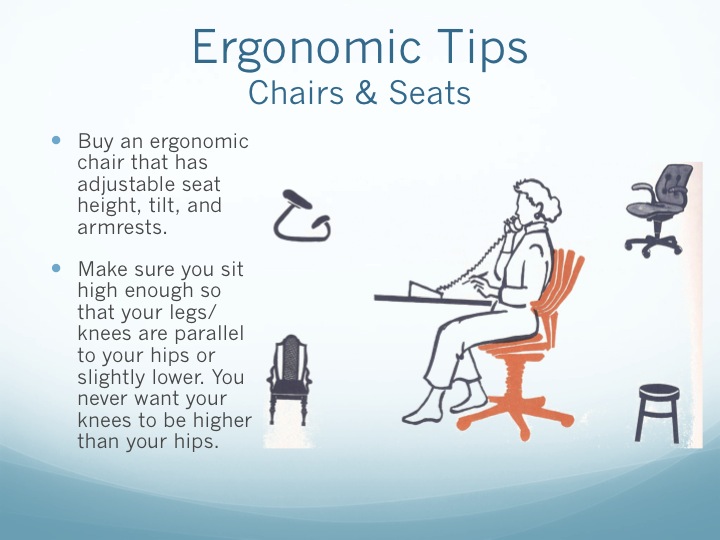
Buy an ergonomic chair that has adjustable seat height, tilt, and armrests. There are very important and must be adjustable.  Make sure you position your seat high enough so your legs and knees are parallel to your hips or slightly lower. You never want your knees higher than your hips.

Once sitting, make sure you are sitting on your sit bones and your feet are on the floor. Try not to cross the ankles or place your feet on the base of the chair.  It is better to sit with your legs spread apart than crossed, even spreading the legs to the outer edge of the chair will give your pelvis and spine more support.

If your chair has armrests, adjust them to be low enough so your forearm is parallel to the armrest and your shoulders remain relaxed. If the armrests are too high, it will push the shoulders up and create tension. Ideally, armrests should only be used when you are pausing to type or reading.

When you use the mouse or keypad, allow your wrist to be relaxed and use your whole arm to move the mouse rather than just your hand and wrist. Refrain from only using your wrist while keeping your arm quiet. This will lead to strain and possibly carpel tunnel syndrome.

Sharon Starika movement educator "Posture in the Workplace"

Sharon Starika movement educator "Posture in the Workplace"

YOUR DESK OR WORK SURFACE

The height of your desk or work surface should be adjusted to match your sitting. First adjust your seat to the correct height and then adjust your desk or work surface to be at a height where your arms can comfortably write, type, or rest on the surface.

Sharon Starika movement educator "Posture in the Workplace"

Sharon Starika movement educator "Posture in the Workplace"

WORKING ON A COMPUTER

Position your computer screen directly in front of you, allowing 14-25 inches between your eyes and the screen depending on your visual acuity. The height of the keyboard should permit your arms to slope downward slightly; this will prevent carpel tunnel as well as wrist and elbow injuries. Documents are best placed either in front of you on your work surface or on an adjustable vertical stand next to your monitor.

Take breaks and exercise or rest your hands and fingers if you feel any strain or fatigue. You can do circles with your hands, clench your fists, or spread your fingers apart to give them a rest. Again, proper posture will give your more energy and help you be more productive in your workplace.

Sharon Starika movement educator "Posture in the Workplace"

DRIVING

We spend a lot of time driving and sitting in the car. Whether to and from work, or just as a part of your job, how you sit in your car is as critical as how you sit at your desk. Once you are sitting in your car, lean forward to scoot your sit bones all the way back into the back of the seat.  The image below shows a lower back support, so if you feel you need one you can add that in. if you don’t feel you need that additional support, be sure learn forward and scoot your sit bones all the way back. You want to allow your back to touch the back of the seat and be angled slightly backward. You don’t want the back of the seat to be too upright pushing your body forward.

Once your pelvis is in position, then you can adjust your car seat either moving it forward or backward for the appropriate distance to reach the petal. Make sure your knees are slightly bent so you are not over reaching with your right foot/leg and pulling the right side of your pelvis forward. Also make sure the seat is level if possible and avoid leaning your elbows on anything in the car.  Often if you have developed a leaning habit at work you continue the habit in your car. Any kind of leaning can create tension in your neck and shoulders.

Have a relaxed grip on the steering wheel; avoid clenching or gripping the wheel. Gripping the steering wheel will create tension all the way up the arms.

Take frequent breaks if your going on a road trip or do any kind of distance driving. Sitting for too long in the car will make it more difficult to maintain proper posture and you will likely return to old habits of slouching or leaning.

Sharon Starika movement educator "Posture in the Workplace"

Park City Women’s Business Network

It was an honor to speak at the Park City Women’s Business Network meeting on Tuesday, August 21st. For more information on attending the meeting or becoming a member click here.

10 Techniques to Relieve Stress, Anxiety, and Worry

Notice how all ten techniques listed below shift your attention to a place in your body, and out of your mind.  This is truly the quickest and most efficient way to relieve stress, anxiety and any type of tension. Try one out!

Sharon Starika Park City, Utah Feldenkrais Practitioner Relieving Stress, Worry, and Anxiety

1. Notice your breathing and start by taking in a breath for 6 counts, pause, and exhale for 6 counts. Repeat this 8-10 times and then notice how you feel.

2. Close your eyes, then cover your eyes with your palms, create the deepest black you can. Direct your eyes to look towards the bridge of your nose. Continue to focus here for 8-10 breaths. Notice now how you feel. What were you thinking before?

3. Close your eyes and bring your focus to the inside of your mouth. Get a sense of the space inside your mouth then slowly begin to have your tongue explore the upper right side of your teeth. Start on the right coming around to the front, and then over to the left. Move your tongue along the bottom of the upper teeth, then the area between the cheek and gums, and then along the inside area of the teeth. Repeat each area three times before shifting to another area. Repeat with the lower teeth going from the left side to the right. Repeat the movement at least three times. How do you feel now?

4. Bring your awareness to your right foot, starting with the right big toe. Can you slowly bend the right big toe and then straighten it? Then gently bend all of the toes and straighten 8-10 times. Repeat with the left foot. How do you feel?

5. Bring your awareness to your toes. Think about the toes on your right foot and spread your toes wide apart and then let go. Then try bending the toes (like in exercise #4) then spreading the toes apart then bending again. Repeat this 8-10 times on each foot. How do you feel now?

6. While sitting down, bring your awareness to your pelvis. Slowly round your back, sit sloppily and slouch. Now begin to arch your lower back to sit tall. Repeat 8-10 times. Notice how the rounding and arching of your pelvis affects your spine. Do you grow tall as you arch your spine? How do you feel now?

7. Bring your arms straight out in from of you, cross your right arm over your left, interlace your fingers and fold your hands under the gap in your two arms, bringing the hands towards your chest. Only go as far as is comfortable and then reverse the movement. Each time go a little further until the arms/hands are coming up through the hole your arms created, and begin to lengthen the arms straight out in front of you. Never let the grip go but remember to stay comfortable. Repeat 6-8 times. How do you feel now?

8. Bring your awareness to your head and begin to tilt your right ear towards the right shoulder. Repeat 5-6 times. Next try to bring your right shoulder up to the right ear 5-6 times. Now begin to move them together, focus on the two moving at the same speed coming together and moving away from each other. Repeat 6-8 times. Now try the same movements with the left ear and left shoulder. How do you feel now?

9. While sitting or lying down, close your eyes and begin to move just your right wrist. Imagine you are pulling a Kleenex out of a box. Your wrist drops down and all of the fingers come together, then lift the wrist and begin to spread the fingers apart. Repeat 10-15 times with each hand, going very slowly and paying close attention to the fingers coming together as the wrist drops and the fingers spreading apart as you lift the wrist and the hand opens and the fingers fall back.

10. While sitting, bring your awareness to your pelvis. Notice your two sit bones and then begin to lift your right sit bone so all of the weight is on the left sit bone. Lift the right sit bone and then let it down. Pay attention to the lifting and lowering of the right side. Repeat 6-8 times. Can you keep your right foot on the floor as you do this? Can you maintain your breathing while doing this? Can you repeat on your left side? Now how do you feel?


Trekking Workshop with SoulPoles

Who is Feldenkrais for?

Anyone can benefit from practicing Feldenkrais, whether in one of my weekly Awareness Through Movement classes or in a private session. Every aspect of a person’s life can be made easier by learning through the Feldenkrais Method how to move more efficiently. This work can reduce daily aches and pains, rehabilitate injuries, and improve athletic performance or general mobility.

Awareness Through Movement classes involve simple movements that will free you from pain while increasing your range of motion, bringing you to a level of awareness where you learn how to let go of excess effort and discover your body’s freedom to move. These classes offer the wonderful combination of joint mobility while increasing your length and flexibility. To enjoy your daily life, sports, and to have a functional body, this combination is key to a greater balance between strength and flexibility.

Curious about how Feldenkrais can improve your life? Attend one of my weekly classes at the MARC, Silver Mountain Sports Club & Spa or schedule a private session.

WEDNESDAYS:

“The Feldenkrais Class” 9:30-10:30am at MARC (previously known as the Racquet Club)

“Moving Pain Free” 12:30-1:30 pm at Silver Mtn. Sports Club at Prospector

THURSDAYS:

“The Feldenkrais Class” 6-7 pm at MARC

SCHEDULE A SESSION WITH SHARON:

Sharon@SharonStarika.com

(435) 655-1989